petak, 10. kolovoza 2018.

How to Fix iPhone Reminders Not Working in iOS 11.3

How to Fix iPhone Reminders Not Working in iOS 11.3 2019

How to Fix iPhone Reminders Not Working in iOS 11.3
Tip 1. Check Reminder Settings

Sometimes you fail to hear the reminder because you’ve set the reminder alert to none. Check that before we move on to more invasive solutions. Here’s how you can do that;

Step 1: Go to Settings and then tap on “Sounds”.

Step 2: Scroll down to find “Reminder Alerts” and tap on it.

Step 3: if the reminder is set to “None” select one of the many alert tones available and the next time your reminder “reminds” you to do something you’ll actually hear it.


Tip 2. Turn Off Reminders App from iCloud

You can also try turning off the reminders in iCloud and then turning it back on. This usually has the effect of removing some bugs that may be causing the reminder app too behave abnormally. Here’s how to do this;

Step 1: Go to the Setting app and then tap on iCloud.

Step 2: Find “Reminders” and toggle the switch to “Off.”

Step 3: Wait a few seconds and then turn it on again.


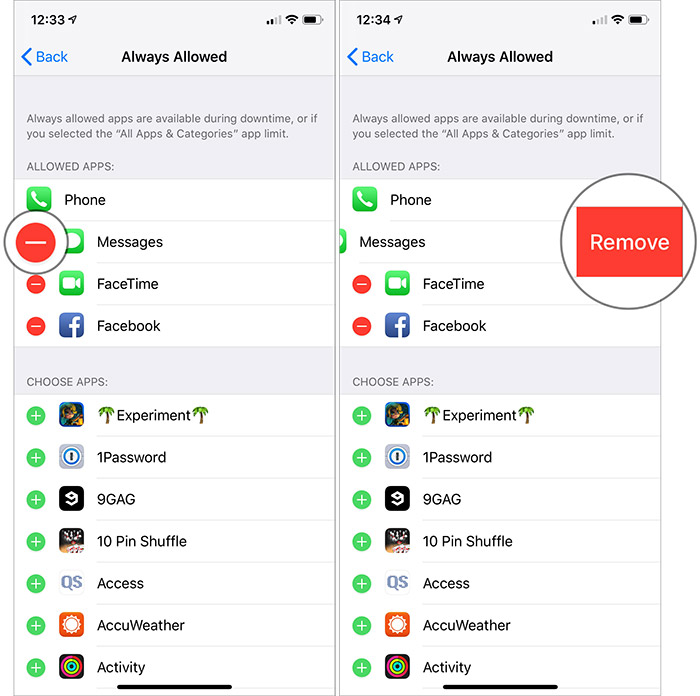
Tip 3. Remove Reminders from Widgets Notification

You can also try to remove the Reminders app from the widget notification. Here’s how to do that;

Step 1: Scroll down from the top of the screen until you see the “Edit” button appear.

Step 2: Tap on this “Edit” button and you’ll see the “Reminder” app in the list of apps.

Step 3: Tap on the red (-) next to it to remove it.


Tip 4. Restore iPhone to Factory Settings

It may seem like an extreme measure to take but if none of the other methods above have worked, you may need to reset your iPhone to factory settings. This means that you’ll erase all the contents and settings on the device. The reason it works is becauseyour Reminders could be affected by a small setting that you may not be able to find. Erasing the settings and contents may be the only way to remove this problematic setting and get your device working normally again. Here’s how to restore an iPhone to its factory settings;

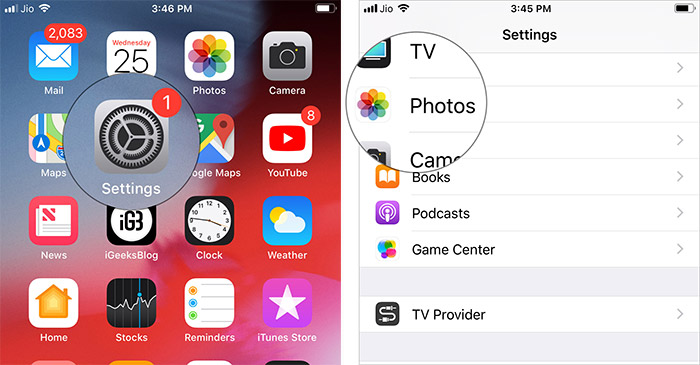
Step 1: Open the settings app on your device.

Step 2: Go to General and then tap on “Reset”.

Step 3: Now tap “Erase Contents and Settings.”

If you had a backup, you can set up the device and restore it from that backup.


Tip 5. Restore Your iPhone System

You could also try to restore the device from an iTunes backup. This process has been known to work for just about any problem your device may be exhibiting. Here’s how you can do that;

Step 1: Connect the iPhone to the computer using USB cables and then launch iTunes.

Step 2: Click on “Summary” and click “Restore Backup” when the option appears.

Step 3: Click “Restore” and if you’re restoring from an encrypted backup, you may need to enter your password.


Gihosoft Total Video Converter is a professional all-in-one video tool that enables you to convert videos and audios into various different formats. You can also download videos from YouTube or other online video sharing sites and convert them easily. Plus, you’re able to personalize your videos with its inbuilt editor, such as, trimming, cropping, applying video effects, adding watermark, subtitles, and more. If you need a powerful and professional desktop video converter program, just download Total Video Converter and follow the step-by-step guide here to have a try.
Jihosoft Android Data Recovery: the best Android Data Recovery software for Windows and Mac to recover deleted contacts, messages, photos, videos, WhatsApp and etc from Android devices.
Gihosoft Free Android Data Recovery can help you easily recover lost data such as photos, videos, contacts, text messages, WhatsApp & Viber chats from Google Pixel/XL or other Android phones effortlessly.
If you lost videos from iOS Camerall Roll which are nowhere to download again, you can use Gihosoft iPhone Data Recovery to get back deleted videos from iOS device including iPhone, iPad and iPod Touch.
Any app suggestions or topic recommendations are appreciated in the comments down below.


Fix iPhone Error 2009 in iTunes


When iPhone owners try to update or restore their device, they usually stumble across different errors. If there is an error, there is no continuation of restoration or update, until the error is removed. One such issue is the error 2009. If you’ve been facing this error, you’re in the right place. This post talks about 5 tips you can implement to fix iTunes error 2009 and remove this bug completely to continue with what you’re doing.


5 Tips to Fix iPhone Error 2009 in iTunes


Here are 5 tips to try if you got error 2009 while restoring your iPhone via iTunes:


Tip 1: Check iTunes to see if there is any update available. If there is, you should go ahead and download it and then install it.


Tip 2: Restart your PC. Most of the errors may surprisingly be no longer there after the computer has been restarted. Once it is switched back on, launch iTunes, and restore or start the update again.


iTunes Error 2009 Message on PC


Tip 3: Ensure that your antivirus is updated. This can be quite significant. Check to see if your security software has any update available. If there are, install and download them, and then try to update or restore your iDevice.


Tip 4: The next thing you should try is restoring iTunes. This is because in many instances, the issue could be with iTunes, and therefore, the update be not be the answer to the problem. Uninstall iTunes first, and then download it again, and then install it.


Tip 5: Deactivate iTunes helper. For doing this on Mac, head over to System preferences -> Accounts and then select Login items. When you view iTunes Helper, deactivate it. For doing this on Windows, head over to Start -> Run and then type msconfig, and then hit enter on the keyboard. Search for iTunes helper and deactivate it.


After a while, iTunes will reactivate the process, but this isn’t important. You only require it until the update or restoration process is done.


Extra tip to fix iTunes error 2009: Try to restore your iPhone or iPad using another Computer. Use your friend’s Computer to restore the device. You need to follow the same steps:


Connect your iPhone to the PC or Mac.


Open iTunes and click on the Restore button.


Restore your device.


Now you need to activate your iPhone.

The iTunes error 2009 now should be resolved and the restoring or updating process should be completed.


We hope that these 5 tips are going to help you to fix error 2009 on your device. If it doesn’t, you should visit an Apple Store or get in touch with customer support.


If you lost videos from iOS Camerall Roll which are nowhere to download again, you can use Gihosoft iPhone Data Recovery to get back deleted videos from iOS device including iPhone, iPad and iPod Touch.

Jihosoft Android Data Recovery: the best Android Data Recovery software for Windows and Mac to recover deleted contacts, messages, photos, videos, WhatsApp and etc from Android devices.

Any app suggestions or topic recommendations are appreciated in the comments down below.

utorak, 31. srpnja 2018.

Can You Recover WhatsApp Chats After Factory Reset Directly from iPhone?


Can You Recover WhatsApp Chats After Factory Reset Directly from iPhone?

Usually the deleted or lost data including WhatsApp chats on iPhone are recoverable. You can recover them on deletion if actions are taken immediately. However, if you have performed factory reset in your iPhone and formatted it, unfortunately the data that has been deleted becomes irrecoverable. You should be aware that an iOS device utilizes SQLite database technology through which it makes the track of your data and saves their address in the device. When accidental deletion happens to your device, the data are not completely removed. The SQLite is changed to be "Unallocated" in order to free up the space for the new data. The accidentally lost data gets hidden in the device and can be recovered by third-party tool. However, there is a difference between accidental or normal deletion and deletion due to factory reset. The deletion due to factory reset will complete remove all the data and settings. Hence, it makes it hard and nearly impossible to recover WhatsApp chat after factory reset directly from iPhone. You can only recover the data when you have backup and we have given the tutorials for this in the following sections.Free iTunes/iPhone Backup Extractor for iPhone, iPad


ponedjeljak, 30. srpnja 2018.

Best Alternative to iExplorer

Best Alternative to iExplorer
What Is iExplorer & What It Can Do?

iExplorer, which was formerly known as iPhone Explorer is an iPhone manager tool that lets you transfer messages, music, photos, videos, notes and any data from your iPhone, iPad, iPod or iTunes backup to any computer. It is an iPhone browser that allows you to browse the data files and folders on your iPhone, iPad, or iPod as if it is a normal flash drive. Besides, iExplorer makes it easier for iPhone, iPod, and iPad users to manage, browse and export music to iTunes library or a computer with ease. This reduces the challenges faced by many iDevices’ users when it comes to managing their data files on iPhone.
Main Features of iExplorer


Auto transfer music from iOS devices to computer or iTunes.


Export SMS, iMessages, and other types of data to computer.


Use your iPhone, iPod or iPad like a USB flash drive.


Access files on iPhone, iTunes backups/purchases and iCloud.


Pros and Cons of Backuptrans iTunes Backup Extractor
Pros


Transfer music to iTunes is good for lots of users.


View iPhone's photos directly in Mac Finder or Windows Explorer.
Cons


It requires the installation of the latest version of QuickTime drive.


It is incapable of importing photos, videos and other files from a personal computer to an iOS device or from one iPhone to another.


It doesn’t support 3rd-party social apps, for example the most popular WhatsApp.

As you can see iExplorer has its flaws and if you are not happy with its cons and want an easier-to-use and functional alternative to iExplorer, then you are in the right place. Apart from iExplorer, there are other apps available online, however, iMyFone iTransor stands out among them all. This is because it offers a smooth and easy iPhone file management experience.

Sponsor Ads:

Gihosoft Free iPhone Data Recovery is a professional iPhone Data Recovery software to get back all your lost text message, photo, video, call history, note, contact and more from iPhone/iPad/iPod Touch. It offers a full solution to recover your lost data in different tough situations. Besides recovering data directly from iPhone, iPad and iPod touch, it also allows you to recover data from iCloud and iTunes backup files.

iPhone backup unlocker:Recover iTunes Backup Password.

iPhone backup extractor free:The best iPhone Backup Extractor software to extract photos, text messages, contacts, voice memos, note, WhatsApp, Viber and etc from iPhone/iPad backup.

četvrtak, 26. srpnja 2018.

How to save Photos in JPEG instead of HEIC on iPhone Running iOS 12

How to save Photos in JPEG instead of HEIC on iPhone Running iOS 12

Step 1. Start the Applying settings on your iOS device.


2nd step. Now press Camera.


Step 3 Then press formats


Step 4 Then select More compatible.


Now your iPhone will take JPEG photos and H.264 videos. However, you will need to go into High Efficiency every time you want to shoot 4K at 60 fps and 1080p at 240 fps.
Automatically convert iPhone / iPad photos to JPEG when transferring to a Mac / Windows PC

The latest versions of iOS allow you to automatically convert HEIC images to JPEG when transferring to Mac or PC.

Step 1. Open Applying settings on your iOS device → Photos.


2nd step. Now scroll down and select Automatic.


That’s about it!

Your catch?

Although “Heek” is not yet widely supported, it is the future. Therefore, I would suggest that you opt for JPEG only when you have to deal with the problem of incompatibility. Do you have questions? Let us know below in the comments.

Photo: Pixabay

Source

Sponsor Ads:

Gihosoft Free iPhone Data Recovery is a professional iPhone Data Recovery software to get back all your lost text message, photo, video, call history, note, contact and more from iPhone/iPad/iPod Touch. It offers a full solution to recover your lost data in different tough situations. Besides recovering data directly from iPhone, iPad and iPod touch, it also allows you to recover data from iCloud and iTunes backup files.
Gihosoft Android data recovery Free is a super awesome software specialized in Android file recovery. With this program, you are able to recover deleted photos, music, videos, messages, contacts, call logs, WhatsApp messages, Viber chat history and more from Samsung, Huawei, LG, HTC, Motorola, Google, Oneplus, Sony, Lenovo, ZTE and other Android devices directly. Meanwhile, this Android data recovery software is available for both Windows and Mac platforms.


utorak, 24. srpnja 2018.

How to Use App Limits and Downtime in iOS 12 to Restrict Excessive Usage of Apps

How to set daily time limits for on-screen application categories


Note: The limits of the application are automatically reset every day and apply to all devices synchronized with the same iCloud account. In addition, you receive an alert five minutes before the restriction expires. However, you have the great option to override the limitation, if you choose to break the rule.


Step 1. Open Applying settings on your iOS device.


2nd step. Now press Screen time and select Limitations of the application (Make sure the time of the screen is enabled)


Step 3 Then press Add a limit then select the Category you want to restrict.


You have several options like social networks, games. So, choose the one you think your child uses too much.


Step 4 Then press Add in the upper right corner.


step 5. Now, set the time. Discover the option of Customize the days.


Tap and then adjust the time some days according to your need. For example, you can allow your child to play games only 1 hour a day but increase it to 2 hours on sunday.


As mentioned above, there is also an option to enable the time limit for specific applications. Take advantage of this feature if you find that some apps are unnecessarily consuming your precious time.
How to add time limits for individual apps in iOS 12


Step 1. Start the Applying settings on your device → Screen time.


2nd step. Now, press the name of the device then scroll down to the Most Used section.


Step 3 Then select the application what use you want to restrict.


Step 4 Then press Add a limit then set the desired limitation.


You can also set the limit of the application for specific days according to your need by tapping Customize the day.


When the weather approaches, you will receive an alert. And once the time of use is over, the Time Limit screen appears. If you want to continue using the app, tap “Ignore Limit” and then select how long you want to keep the restriction.


At any time, you want to make changes to restricted applications or remove the limitation completely, you can do it easily.
How to edit or delete screen application limits
If you use android phones, please choose Gihosoft Android Data Recovery.With Gihosoft Android Data Recovery, no longer afraid of data loss!
iPhone Manager:Get the ultimate Gihosoft iPhone Manager. Free download for PC/Mac.
Step 1. Open Applying settings → Screen time → Limitations of the application


2nd step. Now select the restricted application category or the application of which you have limited use.


Step 3 Then press Edit apps so what select / deselect the application then press Add in the upper right corner.


If you want to permanently delete the limitation, press Delete the limit and to confirm.


Note: You can also go to Settings → Device Name → Select the restricted application in the More Used section → tap the application name under the Limits section. Then edit or delete the limit.
How to turn off time in iOS 12


With the time off, you can set a schedule in which you do not want to use your device. During the time, you will only be able to access applications that you have exempted from the restriction.


Step 1. Open the application Settings → Screen time.


2nd step. Now press Time to stop.


Step 3 Light up the switch next to Downtime.


Step 3 Next, set the start and end time according to your need.


How to manage applications for an on-screen time-out


Step 1. Open the application Settings → Screen time.


2nd step. Now press Always allowed.


Step 3 Then press the red button to the left of the application and then press Remove under the Allowed Apps section to prevent their use during shutdown times.


Under the Choose Applications section, press green button “+” to allow them to be used during shutdown times.


Note: The Phone application is always available so that you do not miss important calls.
Now restricted applications will be grayed out, and you’ll see Screen time icon under them.


If you want to use the restricted application during unavailable periods, press it and then press “Ignore the limit.” Then you have the option to delete the limitation for 15 minutes or today.


That’s about it!


Packing:


Now that you know how to control the excessive use of applications; Bring the means mentioned above according to your needs. I’m sure that they can be handy for reducing the unnecessary use of apps. Do you have questions? Let us know in the comments.If you lost videos from iOS Camerall Roll which are nowhere to download again, you can use Gihosoft iPhone Data Recovery to get back deleted videos from iOS device including iPhone, iPad and iPod Touch.

Jihosoft iPhone Backup Extractor Extract and recover all types of data from iPhone backup files, such as camera roll photos, videos, SMS, contacts, reminders, WhatsApp, and etc.
Gihosoft Android data recovery Free is a super awesome software specialized in Android file recovery. With this program, you are able to recover deleted photos, music, videos, messages, contacts, call logs, WhatsApp messages, Viber chat history and more from Samsung, Huawei, LG, HTC, Motorola, Google, Oneplus, Sony, Lenovo, ZTE and other Android devices directly. Meanwhile, this Android data recovery software is available for both Windows and Mac platforms.


ponedjeljak, 23. srpnja 2018.

How to Delete Suggested Email Contacts in Mail on iPhone


How to Delete Suggested Email Contacts in Mail on iPhone


To remove old contacts from the Mail app:
  • Tap on the Mail app to open it.
  • Now tap on the write new email icon at the bottom right of your display.
how to remove contactsgo to contacts
  • Start typing your contact's name into the "To" field.
  • Recent contacts will appear with a lower-case i in a circle next to them; tap the i next to the old email address you'd like to remove.If you lost videos from iOS Camerall Roll which are nowhere to download again, you can use Gihosoft iPhone Data Recovery to get back deleted videos from iOS device including iPhone, iPad and iPod Touch.
  • Jihosoft iPhone Backup Extractor Extract and recover all types of data from iPhone backup files, such as camera roll photos, videos, SMS, contacts, reminders, WhatsApp, and etc.
  • Gihosoft Android data recovery Free is a super awesome software specialized in Android file recovery. With this program, you are able to recover deleted photos, music, videos, messages, contacts, call logs, WhatsApp messages, Viber chat history and more from Samsung, Huawei, LG, HTC, Motorola, Google, Oneplus, Sony, Lenovo, ZTE and other Android devices directly. Meanwhile, this Android data recovery software is available for both Windows and Mac platforms.

how to delete contacts on iphoneiphone contacts
  • Now tap Remove from Recents to stop your iPhone from suggesting this email address in future.
how to delete contacts in gmail
Top image credit: sergey causelove / Shutterstock.com